This is a guide for addon managers who manage the ordered addons in a project.
Navigate to Addon Orders:
- Sign in to APEX, and press the menu button to the top left.
- Choose the "Addon" option.
- In the next step, press the "Addon Orders" option.
Here you will see a list, and the first time it is probably empty. To manage what ordered addons are showed in this list, use the filters available. To see more of the filters, press the extended filters button ![]() out to the right.
out to the right.
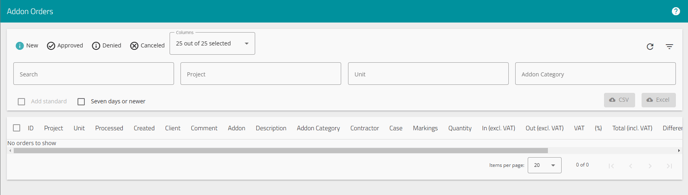
Filter orders
Here you will by default get an overview over "New" orders, being the orders that are not yet managed. By either approving og denying the order, the order get put in a different category and is considered managed, leaving the "New" tag.
What you see by default is also just the basic filter options, by pressing the extended filters button, you get access to more options:
New addons ![]()
New addons is the default setting, and will show you all the new addons. The newest addons will be tinted a soft yellow when they are 7 days or newer. After that they lose the tint and become white.
Approved ![]()
This filter shows all already approved addons. These orders have been managed, or had not been marked for approval, and is then marked as approved (marking an addon for needing an approval is done when connecting the addon to the unit). Approving an order is done by marking the checkbox to the left, and pressing the "Approve" button that appears at the bottom of the screen.
Denied ![]()
This filter shows all denied addons. These orders have been managed, and at some point been marked as denied. Denying an order is done by marking the checkbox to the left, and pressing the "Deny" button that appears at the bottom of the screen. This can be done either when the addon is "New", or after it has already been approved.
Canceled ![]()
These are orders that have been canceled. These have at some point been canceled by the customer before the order was managed by a case manager. The customer can do this from logging in to APEX and in their own order list press an "cancel order" button.
Columns
By the canceled orders filter-button you have the columns drop-down menu. The boxes you decide to check here, is what information is showed in the list of orders.
If you have no need to show what project or creation date, then you can uncheck the boxes and this column of information will be removed from view.
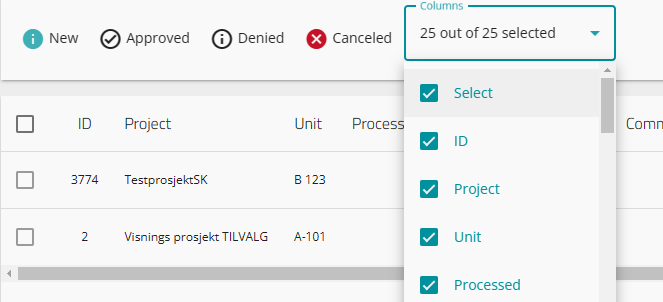
Also note that the column headers can be pressed to sort the orders up or down, alphabetically or numerically, depending on the information sorted.
Search
The search field is an free-search option. Use words or numbers to find what you are looking for.
Project
Here you can search for a given project, and then only show orders from that project.
Unit
Here you can search for a given unit, and then only show orders from that unit.
Addon Category
Choose and sort by addon category based on the categories you have made and set up yourself. Here you can search for that specific category, and show only those addons.
Add standard
By checking the box "Add standard", you will also automatically add all addons that is marked as "Standard" in the addon projects you have access to. This only works if you have marked an addon as standard.
Seven days or newer
Check the box for "seven days or newer" to only see the addons that was ordered within the last 7 days, these will also be marked with a yellow tint.
Export options
By pressing the CSV or EXCEL buttons, you will get exports of your current list. "By current list" we mean that you will get an export that is also based of the filters you have set. So what you see in the addon list, filtered or not, will be exported into your chosen format.
NOTE! It is important to mention that you can use all these filters one at a time, or multiple at the same time, to get the list and view that you would like. One example is to combine category and project filters to make sure you can work with only one project and a given category, if so need be.