This is a guide for users with payed subscription/access to the system.
Here we will take a look at how to create a case from the cases overview. Filling out the specifics about a case will be the same from this, like it is from the inspection overview.
Follow these steps to create a new case:
- The cases list is by default the first page when signing in to APEX.
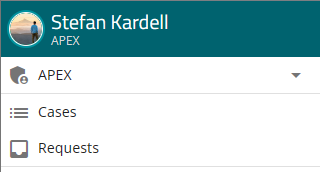
- If not, or in need to navigate back, then press the menu-button in the top left corner and select "Cases" from the menu.
- When in the case list overview, press the plus-button
 down to the right.
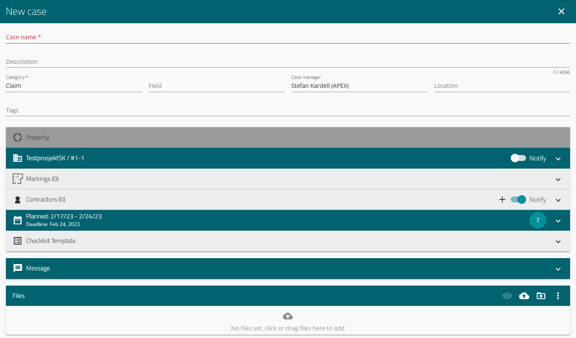
 - Then you will be presented a form to fill out the information about your case. The sections to fill out are as follows, with their own fields:
(Explanation follows further down in this guide).
- Case name
- Description
- Category
- Field
- Case manager
- Location
- Tags
- Project
- Markings
- Contractors
- Planned
- Checklist Template
- Message
- Files
- Press the "Save" button to save your information after filling out the desired info.
- Press the "Save an continue" to save your current case, and create a new case with some of the same information already filled in. Like category.
NOTE!
If any of the sections are not filled out properly when you save your case info, then the section will be colored red, to indicate that action is required.
Explaining fields and sections
Case name
The case name should be short, to the point and explanatory in what the case is about. This is a required field to fill out in order to make a case. If there is a need to put in more information, save that for the "Description" field.
Description
This field is used for filling out more information, or more details, about the case. This can be used to make a description for the contractor on how they could or should work on the case.
Category
The category is used for categorizing cases into different usages for later. Categories have different meanings and use-cases, and also decides when a customer will be able to see information and updates about the case.
If you want to read more about what categories are, and are not, visible to the customer, then view this linked page.
Field
A field is used to quickly add a contractor to a case, by just choosing the field that contractor is assigned to. It does require to set up the field beforehand, to get the most out of the function. Read more about adding fields here.
A field specific for a project, can be chosen after a project is chosen for the case.
If you choose a field before setting a project, you will be able to choose from every field you have access to through your company.
Case manager
The one creating the case, will be set as case manager, unless the chosen project has a predefined "standard case manager". You can also remove the case manager filled out in the field, and then add another desired case manager.
Use favorited users to quickly set other case managers and desired personell on cases.
Location
This is an input field for giving direction to where the case needs to be done/executed.
Some examples could be: "Bathroom, 1st floor" or "Living room west wall".
Tags
Tags are a way to mark cases with your own custom labels. Case managers and admins can create tags, but anyone with a connection to a case can filter by the tags. This can be used to organize and filter cases, in order to more easily find a set of cases marked with the same tags later.
Read more about filtering cases here.
Project
Here you choose the project the case belongs to. By choosing a project, you get the choice to add a corresponding unit or building that the case is being done. You only get these options if the project belongs to your company, or you are added as a case manager on the projects.
Read more about case managers and adding them, here.
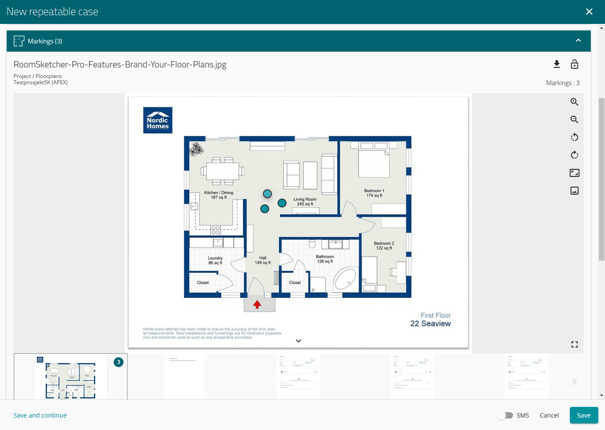
Markings
If you have chosen a unit with an already added floorplan, then you can also mark on the floorplan where the case describes the work needed to be done. This way, you know exactly where to execute the work.
Contractors
In this step, you can add a contractor to the case. This will be the one to work on and finish the job that the case represents. Here you can search for all contractors and firms that has been added in APEX. If you can't find your desired company, then you can add them yourself, or contact us for guidance.
Read more about adding a new company to APEX, and adding contractors to companies.
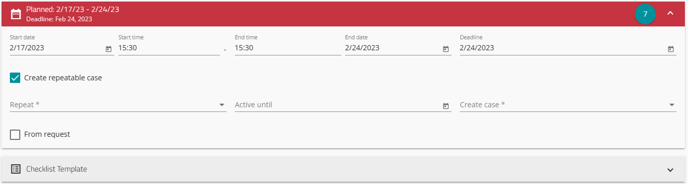
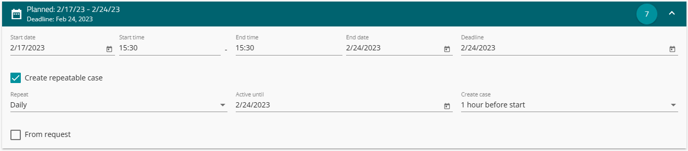
Planned
Here you can set a deadline for when the case should be completed. The case will stay open even if it is not completed within the time period, but it will be marked as such. Here you can also make a case repeatable, meaning it will automatically be made again, with the same information you put in the original case.
Read more about repeating cases here, and the calendar overview they are connected to.
Checklist Template
Here you can connect a checklist to the case, if there is a need for a step-by-step overview of completed tasks in a case. In order to connect a checklist to a case, you need to make a checklist template first, with the points to check off. This is very handy if a Quality inspection is in order.
Read more about creating a Checklist template here.
Message
In message, you can instantly send a message to the case when it is created. This could be handy if the case involves a customer, or if there is need for additional information that is not needed in the case info itself.
Files
Files can be added to a case. This can give a visual representation of what the case is about, or when it comes to where the case needs to be worked on. On a portable device, you will be prompted to either take a picture directly, or choose from your existing library on the device. Uploading a picture in the case makes it visible for customers added as owners to the unit.