This is a guide for real estate developers, entrepreneurs, contractors and others that want to create and use checklists in APEX.
To let others use the created checklist template, they must be added as a case manager or collaborator to the template, or be part of the same company as the one that created the template.
Note!
Only the administrator in a company can create checklist templates and connect case managers to the checklists.
Fill out template settings
- Sign into APEX, and press the menu icon to the top left.
- Choose the menu option "Checklists".
- You are then shown 5 options, choose "Checklist Setup"
The options:- Checklists.
- Checklist Groups.
- Checklist Setup.
- Checklist Group Setup.
- Projects.
- On the setup-page, press the plus-ikon
 down to the right.
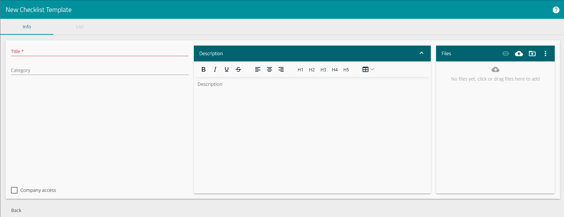
You are then taken to the settings for your template.
- Give your template a name/title (this is required to fill out in order to make a template).
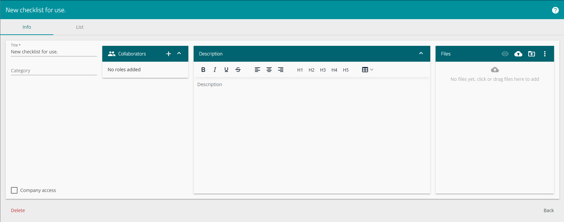
- After setting a name, the form will automatically save and update, and show more information.
- Set a category for your template. The category you set here, will be the category set for all the created checklist points, when the template is used to make a checklist. By doing this, the points can later also be filtered by in your cases list. (Because the points from the checklist is also cases).
- Add a collaborator for the checklist template, they must already have a user in APEX to be added like this. The users added as collaborators will be able to edit the template, in addition to use the template to create checklists.
- The Collaborators section is one of those that are added after you have set a name/title to your template.
- Give your checklist template a description in the description field. The description will follow the template and every checklist that is created from it.
- Drag and drop a file to your checklist template, or press the upload button (the cloud with an arrow). The files will also follow the template and every checklist that is created from it.
- If you want other users in your company to have access to the template, in order to create checklists from it and so on, then check the box for "Company access" down in the left corner of the form.
Add points to your checklist
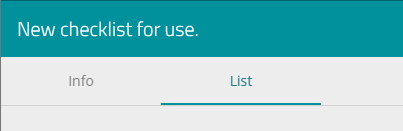
- Up to the left, you will see two tabs, "Info" and "List". Press the "List" tab in order to add checklist points to your template.
- These are the points that will be created with your checklist in use later, where you can check the boxes as "done".
- The next page will be blank, with three buttons; "Delete", "Back" and a plus-icon.
- Press the plus-icon
 in order to create an item to your template. Choose from an "Item" or a "Section".
Item
These are what later becomes the points that you systematically check off, when going through the created checklist. This is what you see when creating an item:

- Give your checklist items a name (required in order to create it).
- Give your checklist items further descriptions in the field "Description".
- Upload a file to your checklist item by pressing the clipper-icon. The file will then follow the checklist item when it is created into a point, and for every checklist that is created from this template.
- Connect items to sections, if you need them gathered or sectioned.
- If you want an item copied or used multiple times, then you can copy the item by pressing the copy-icon.
- If you want an item deleted, then press the red cross.
Section
A section is a way to sort points under a common theme. This is what you see when creating a section:
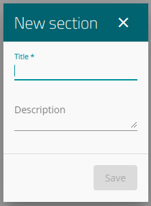

- When a section is added, you can directly add an item or new section to the section by pressing the small, white plus-icon in the section row.
- Adding a section to a section will let you sort all items and future points the way you need.
- Delete a section by pressing the trashcan icon on the section row
 .
.
- Note! If you delete a section, you also delete the items you have made in/under it.
- Edit a section by pressing the pencil icon on the section row.
- The checklist template will be periodically saved when you update it with changes.
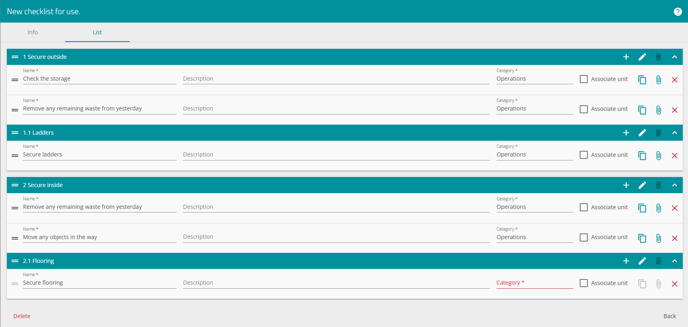
A checklist template could be looking something like this when you have added sections and items to it:
You can read more about using the template to create a checklist here.
TIP!:
Make a checklist template available for everyone in your company by checking the box "Company access".
Everyone in your company will then be able to make a checklist from the made template, and reuse it over and over.